When working with 3D Renders, one has limitless potential when it comes to implementing changes to any aspect of the design. These possibilities go way beyond choosing objects, including but not limited to cars, people, furniture, forms, textures, colors, adding or removing them, and changing landscapes and the environment around the desired object. All of this allows the creation of a 3D Render that complies with all the requirements regardless of their complexity.
Nevertheless, all these details won’t help to produce a truly beautiful render without the proper illumination. Lighting carries out a crucial role in building a beautiful 3D Render. To make a selling render, one can work with direction, power, size, and other parameters of light sources. It goes without saying that the time of the day has an incredible effect on the final quality of the render. It can be used to transfer the right mood to the viewer in combination with changes to the background. You can manipulate the render to make it represent any weather and time of the day.
Today, we are going to discuss the night and daytime views and find out what changes in terms of lighting, objects, and other aspects. Furthermore, we are going to introduce you to the best ways of using these night and daytime settings for your 3D Renders by helping you understand when to use each of them to make your business prosper.
Night view 3D Renders
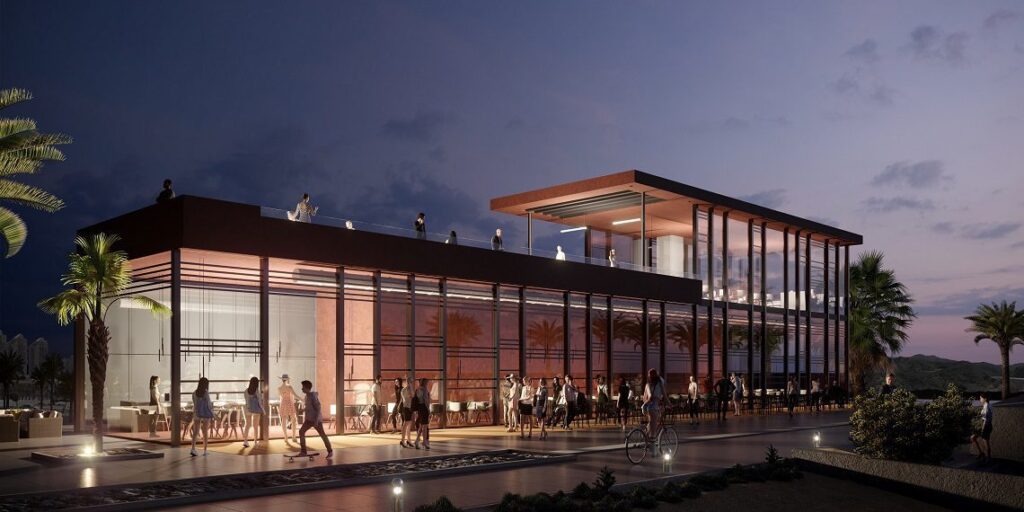
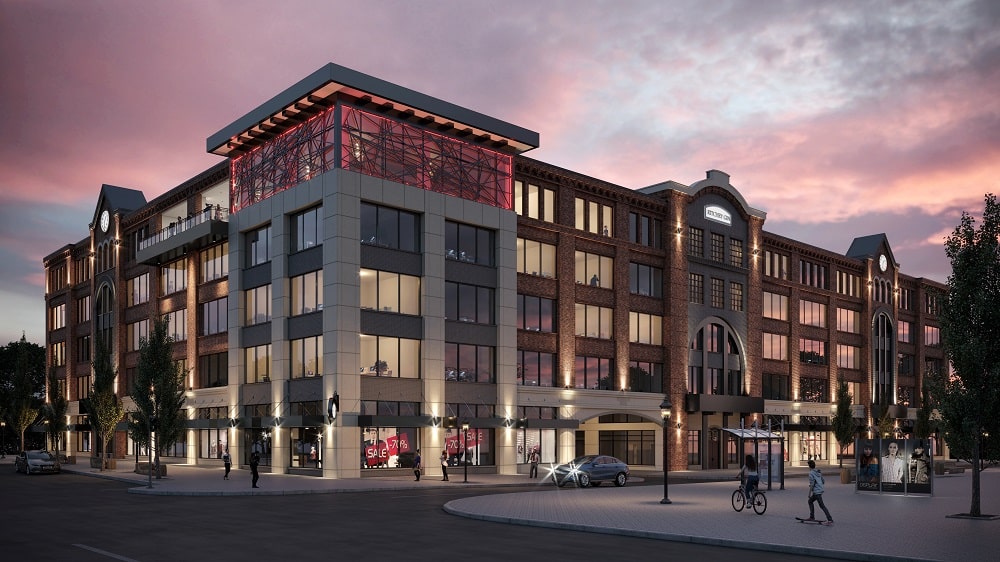
This type of 3D Render is used to visualize the looks of the project after the sun is down. As it goes from the name, the lighting from the sun is no longer an option, so night view 3D Renders simulate lighting from other sources such as the moon. Furthermore, the night view allows presenting the artificial lighting from its best side. In succession, this allows you to demonstrate what is your design idea of how the object or room will look without natural light.
In this case, your design idea should include artificial sources of light.
Think ahead about how the internal light, such as lamps and chandeliers, if necessary, together with external lights, will be located and what kind of light they will be producing. Your initial plan significantly affects the effect and impact the lighting will cause on the viewers.
The darker external environment adds the viewer’s focus on the objects in the room or house. In the case of internal 3D Render, it gives you a chance to highlight the most delightful parts of your design. The desired effect can be achieved by using additional multiple but smaller light sources. Those can generate the most impressive result when lighting small zones and objects.
Night View is great for:
- Highlighting exactly what you need
- Showing your design from another perspective
- Adding life to the render
- Picturing high-end homes
- Futuristic designs with a play of light and shadow
Day View 3D Renders
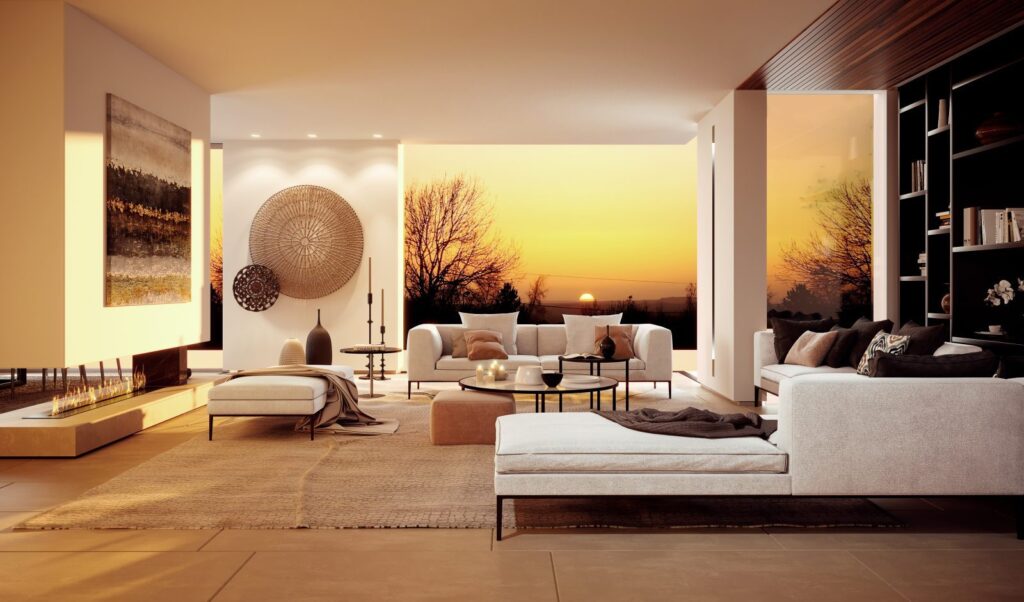
Daytime renders are the most commonly used type of 3D render. Day view usually pictures a project during the brightest part of the day when the sun is still at its zenith. Usually, it is better to use clear skies and sunny days. In the case of day view 3D Renders, designers completely rely on the sun upon. It is a perfect natural source of light illuminating everything in the room unless planned otherwise. Therefore, when working with internal renders, it is crucial to pre-plan objects and their positions on the 3D Render.
Day view is especially effective in places that have many reflections, including but not limited to mirrors, windows, glossy floors, ponds, swimming pools, oceans, and so on. Ensure that all the reflections look natural, as this is the key aspect that will create a gorgeous picture for the viewer. The effect can be increased furthermore by applying it to large rooms or buildings. Daylight is so popular for a good reason – it allows the creation of the most stunning 3D Renders.
Day View is great for
- Homes located near the water
- Coastal homes
- Outdoor areas with multiple glass elements
- Homes with minimal exterior lighting
Is There a Middle Ground?
A night and day are two ends of the spectrum, but does it mean that you should strictly adhere to one of those options? Nope! It is up to you to select any part of the day and weather conditions to visualize your project. Remember, you have a countless number of various options to apply for your 3D Render. One of the prominent features of this technology is that you are not limited by ways and means of manipulation of the environment of the 3D Render. Moreover, consider checking out our tips about interior design 3D Rendering to learn what makes a million-pound shot. Information that you can find there will help you furthermore improve your chances of making a selling 3D Render.
Final thoughts
As you can see, there is no choosing a particular option and sticking to it. Each type of 3D Rendering has its own features and can be used in different situations and for various goals. Determining day vs night 3D Renders is all about tuning the viewer to the desired mood and highlighting your project from its most capable side. Therefore, before deciding what time of the day you want to use for your 3D Renders, first of all, consider your own goals. Next, highlight the soundest sides of your project. Finally, analyze your target viewer. In this manner, you will get a higher chance to produce a render that will definitely inspire and impress your viewer.